How to Build a Shed Step by Step: Complete Beginner Guide
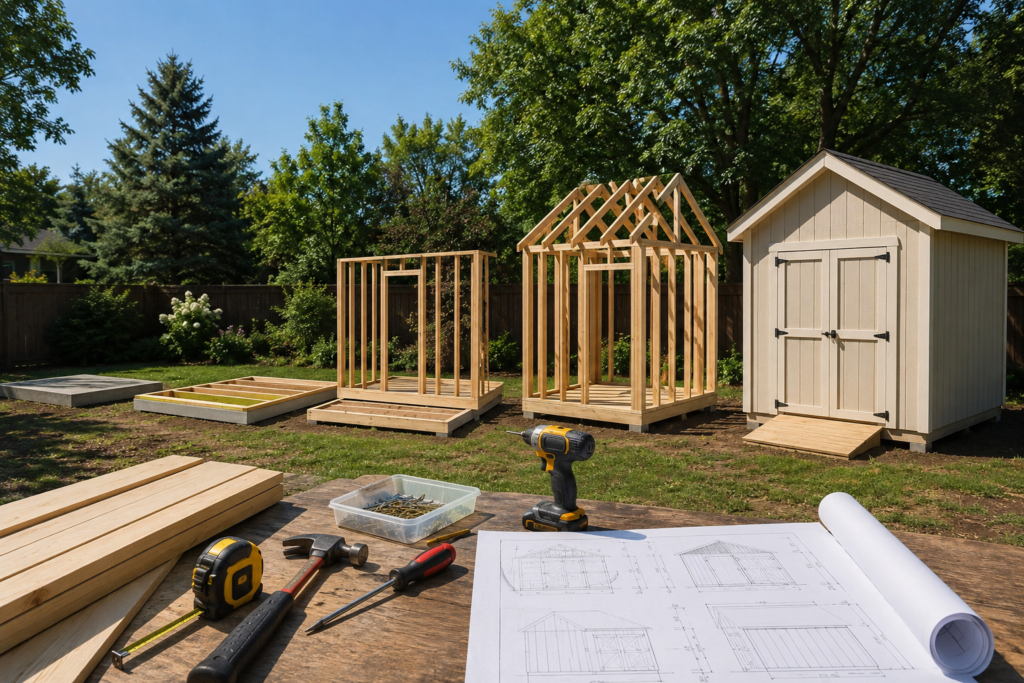
Building your own shed is one of the best DIY projects for adding extra storage, workspace, or value to your backyard. Whether you need a garden shed, tool shed, storage shed, or small workshop, the key to a successful build is starting with a clear plan.
In this guide, we’ll walk you through the main steps to build a shed from the ground up, including the foundation, floor, walls, roof, doors, windows, siding, and finishing details.
Important note: This guide gives you a general overview of the shed-building process. For exact dimensions, cut lists, material lists, elevations, framing layouts, and permit-ready drawings, we recommend using our detailed shed plans.
👉 Shop our permit-ready shed plans here: [ Permit-Ready Shed Plans ]
Why You Should Start With a Detailed Shed Plan
Before buying lumber or cutting any boards, you need a proper shed plan. A good plan helps you understand the shed size, wall layout, roof style, door placement, window placement, material list, and construction sequence.
Many beginners make the mistake of starting with only a photo or a rough idea. This often leads to wasted materials, wrong measurements, weak framing, or problems when applying for a building permit.
Our shed plans are designed to make the process easier. They include clear drawings, dimensions, material lists, and construction details so you can build with confidence.
Step 1: Choose the Right Shed Size and Style
The first step is deciding what type of shed you want to build. Think about how you will use the space.
A small 8×10 shed may be enough for garden tools, bikes, and outdoor equipment. A 10×12 or 12×16 shed gives you more space for a workshop, lawn mower, storage shelves, or hobby area.
You should also choose the roof style. Common shed roof styles include:
- Gable roof shed
- Lean-to shed
- Modern shed
- Gambrel roof shed
- Barn-style shed
The roof style affects the look of the shed, the interior height, and the framing method.
Before building, check your local building rules. Some areas require a permit depending on shed size, height, foundation type, and location on your property.
👉 Need drawings for your permit?
Browse our permit-ready shed plans with full dimensions and construction details.
Step 2: Prepare the Shed Site
Choose a flat, accessible area in your yard. The site should have good drainage and enough space around the shed for construction and maintenance.
Clear the area of grass, roots, rocks, and debris. Then level the ground as much as possible. A shed should never sit directly on soft soil because moisture and movement can damage the floor over time.
Good site preparation helps prevent future problems such as sinking, water damage, uneven doors, and warped framing.
Step 3: Build the Shed Foundation
The foundation supports the entire shed, so it needs to be solid and level.
Common shed foundation options include:
- Gravel pad
- Skid foundation
- Concrete blocks
- Concrete piers
- Concrete slab
For many backyard sheds, a gravel pad with pressure-treated skids is a popular option because it is affordable, drains well, and is easier to build than a full concrete slab.
For larger sheds or permit-required projects, concrete piers or a slab may be required. Always check local code before choosing your foundation.
Pro tip: A level foundation makes every other step easier. If the base is not square and level, the walls, doors, roof, and siding will be harder to install correctly.
Step 4: Frame the Shed Floor
Once the foundation is ready, the next step is framing the floor.
The floor frame usually includes pressure-treated rim joists, floor joists, and floor sheathing. The joists create the structure, and the plywood or OSB sheathing creates the walking surface.
Make sure the floor frame is square before installing the sheathing. You can check this by measuring diagonally from corner to corner. If both diagonal measurements are equal, the frame is square.
After the frame is square, fasten the floor sheathing securely to the joists.
👉 Want the exact joist layout and cut list?
Use one of our detailed shed plans so you know exactly where every board goes.
Step 5: Frame the Shed Walls
After the floor is complete, you can start building the walls.
Most shed walls are framed with wall plates, studs, headers, and openings for doors and windows. The walls are usually built flat on the shed floor, then lifted into place.
Start by marking the wall layout on the top and bottom plates. Then install the studs at the correct spacing. Frame any door and window openings according to your plan.
Door openings need proper headers for support. Window openings also need correct framing so the window fits and the wall remains strong.
Once each wall is framed, raise it carefully, align it with the floor edge, and fasten it in place.
Step 6: Stand, Square, and Brace the Walls
After the walls are raised, make sure they are plumb, straight, and square.
Use temporary bracing to hold the walls in position while you connect them together. Check the corners, wall alignment, and door opening before moving to the roof.
This step is important because small mistakes in the wall framing can create bigger problems later when installing siding, doors, windows, and roof framing.
Step 7: Install the Siding
Siding protects the shed from weather and gives it a finished look.
Common shed siding options include:
- T1-11 siding
- Board-and-batten siding
- LP SmartSide panels
- Wood lap siding
- Vinyl siding
- Metal siding
Install the siding according to the manufacturer’s instructions. Make sure the panels are straight, properly fastened, and sealed where needed.
If your shed plan includes wall sheathing and separate siding, install the sheathing first, then add the siding over it. Some siding panels can also act as both sheathing and exterior finish.
Step 8: Build and Install the Roof Rafters or Trusses
The roof is one of the most important parts of the shed because it protects everything inside.
Depending on your shed design, you may use rafters or pre-built trusses. Gable sheds commonly use rafters or trusses, while lean-to sheds use a simpler sloped roof structure.
Rafters must be cut accurately so they fit properly on the wall plates and meet correctly at the ridge. For larger roofs, a bottom chord or truss system may be needed for strength.
This is one area where detailed plans are very helpful. A good plan gives you the roof pitch, rafter length, birdsmouth cuts, overhang details, and spacing.
👉 Avoid guessing roof angles.
Our shed plans include detailed roof framing drawings to help you build the roof correctly.
Step 9: Install Roof Sheathing
After the rafters or trusses are installed, cover the roof with plywood or OSB roof sheathing.
Start from the lower edge of the roof and work upward. Leave proper spacing between panels if required by the manufacturer. Fasten the sheathing securely to the rafters or trusses.
Make sure the roof sheathing is aligned and supported correctly. Poor roof sheathing installation can affect the shingles, waterproofing, and long-term durability of the shed.
Step 10: Add Roofing Material
Once the roof sheathing is complete, install the roofing system.
A typical shingle roof may include:
- Drip edge
- Roofing underlayment
- Starter strip
- Asphalt shingles
- Ridge cap shingles
You can also use metal roofing depending on your design and budget.
Follow the roofing manufacturer’s instructions carefully. The goal is to create a waterproof roof that sheds water properly and protects the shed for years.
Step 11: Install Doors and Windows
After the structure is framed and covered, install the shed doors and windows.
Pre-hung doors can save time, but they must be installed square and level so they open and close properly. If you are building custom shed doors, make sure they are braced well to prevent sagging.
Windows should be installed according to their size and flashing requirements. Proper sealing around doors and windows helps prevent water leaks.
This is also where having accurate plans helps, because your door and window openings must match the size of the products you plan to install.
Step 12: Install Trim, Fascia, and Soffit
Trim gives the shed a clean finished look and protects exposed edges.
Common trim areas include:
- Corners
- Door trim
- Window trim
- Fascia boards
- Soffit areas
- Roof edges
Install trim carefully so the shed looks professional and weather-resistant. Seal gaps with exterior caulk where needed, then prepare the shed for paint or stain.
Step 13: Paint, Seal, and Finish the Shed
The final step is finishing the shed exterior.
Use exterior-grade paint or stain to protect the siding and trim. Choose colors that match your home or backyard style.
You can also add finishing touches such as:
- Ramp
- Shelving
- Workbench
- Loft storage
- Hooks and tool racks
- Outdoor lighting
- Vents
Good ventilation is important, especially if the shed will store tools, lawn equipment, or seasonal items.
Common Mistakes to Avoid When Building a Shed
Here are some common beginner mistakes:
- Starting without a proper plan
- Not checking permit requirements
- Building on uneven ground
- Using untreated lumber near the ground
- Not squaring the floor frame
- Framing door openings incorrectly
- Guessing roof angles
- Skipping roof underlayment
- Not sealing doors and windows
- Using poor-quality materials
The easiest way to avoid these mistakes is to build from a clear, detailed, permit-ready plan.
Get Your Permit-Ready Shed Plans
Building a shed is possible as a DIY project, but the process becomes much easier when you have the right drawings in front of you.
Our shed plans are designed to help you build with confidence. They include the details you need for planning, material preparation, framing, roofing, and finishing.
Inside our plans, you get:
- Detailed shed drawings
- Floor framing layout
- Wall framing layout
- Roof framing details
- Elevations
- Material list
- Cut list
- Door and window placement
- Permit-ready construction details
- Step-by-step building guidance
👉 Start your shed project today: [Shop Permit-Ready Shed Plans]
Final Thoughts
Building a shed step by step starts with planning. Once you choose the right size, prepare the site, build a strong foundation, frame the floor and walls, install the roof, and finish the exterior, you can create a strong and beautiful shed for your backyard.
For a smooth project, do not rely on guesswork. Use detailed shed plans that show you exactly what to build and how each part fits together.
Ready to build your own shed?
Check out our complete collection of permit-ready shed plans and choose the design that fits your backyard.